
Authors have many choices these days to get their words published. I’ve discussed the process from draft to done. In this week’s article, I’m going to focus on what authors should do to prepare their files for sending to editors or agents who will make changes to the manuscript.
This is going to be one part demystifying the process and one part (the larger part) looking at the format of your manuscript file and information you plan to provide to your editor or agent so they can do their best work without a lot of unnecessary coding complications.
NOTE these are general guidelines. If your editor, agent, or publishing house, requests something else, be sure to do that.

Words only
The file should ONLY contain words. Cover art, inset graphics, etc, can be seriously misaligned during the editing process because of the way Track Changes pushes things around on a page. The text is the only thing the editor will be editing, so give them only the words. Save layout and page design (where you decide how the images will be included on a page) for the book design step after all the editing has been done.
Paragraphs, margins, fonts
If at all possible, use the following formatting from the beginning of your writing process. Otherwise, go through the entire manuscript and check for these things:
- 1-inch margins for top, bottom, left, and right.
- serif font (is much much easier to read) like Times New Roman.
- single-spaced lines. Yes, a few publishers request double-spaced manuscripts. but it’s getting rarer.
A quick “select all” and change from single to double before submission will handle these folks. - Set up a Body text style with the following and apply it to all the text between chapter headings:
- First line indent 0.5-inch
- Zero (0.0) space above or below paragraphs
Chapters
Chapters should start on their own pages. DO NOT press ENTER a gajillion times to reach the top of the next page. Instead, use a PAGE BREAK (Ctrl-Enter) immediately after the last line of the previous chapter and type the word “chapter” and the number, select this text and apply the Heading 1 style.
Apply Heading 1 to all Chapter titling. For epigraphs, use Body text style but apply italics. DO NOT CENTER anything. If you do this, then the layout and page designer will be able to simply change the details of the corresponding style to match the house style and it will propagate throughout the entire file with the click of just a couple buttons.
The text of the chapter should start after at least 2-3 returns. And remember, apply Body text style so your indents happen automatically.
Page numbers, headers, footers
DO NOT include these. In electronic files the program tells you what page you’re on. And the document size will different for each type of publication method so it’s not useful until the layout and page design step.
Headers and footers will be set depending on house style. Some include different text on right vs left pages. Some put the page number in the upper right (header) and others put the page number in the lower right or center (footer). If you’re self-publishing, you should create a “house” style of your own with these details so all your books will have the same look and feel.
Leaving these things out also avoids the need to divide your document into “sections” (for numbering or not numbering) which can also easily get messed up during Track Changes. Again, save this for the layout and page design step.
Bold, italics
Do use these where they should occur. Some italics are a matter of house style (ship names, or book titles, for example, are italicized). Don’t use bold in dialogue for emphasis. Instead use italics or all-caps for the word(s). This will also communicate to the editor your style preferences and they can catch the things you didn’t bold or italicize (and should have) or vice versa. The key here is to present a consistency of use so a pattern or rule can be assumed and followed. Or corrected when misused.
Underlining or linked text
While these don’t happen a lot in fiction, there are new forms of storytelling coming out all the time and linked text might be jumping the reader to a particular chapter, or in a choose-your-own-adventure, a particular follow up scene. So, when used do so as clearly as possible. It helps to have a pattern to it (makes it searchable).
Don’t do and redo linked text a lot. Remove the link entirely before correcting it to a new link. This will prevent errors in coding and layout later.
Non-story pages
“Non-story pages” are things like the foreword, preface, about the author, dedications, acknowledgements, and copyright pages, other books by, etc. Some are before the story itself; others are after. Regardless, each should start on its own page. (Use Ctrl-Enter for the hard page break). Using Heading 1 style for any titling on top will also help with auto-generating the Table of Contents when layout and page design come around.
Style Guide and/or World Guide
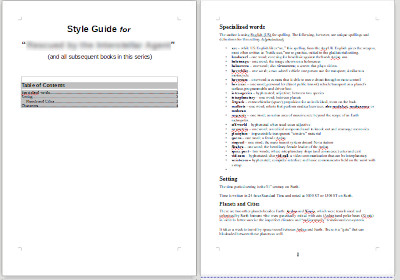
If you are writing to a particular style in terms of spelling (even just UK English instead of US English) or grammar, make sure that you inform your editor of any rules you particularly want to follow (or break with artistic intention).
If your story is set in a fantasy or historical world, send along a list of unique words that must be uniformly spelled such as: place names, character names that are non-typical spellings, and things that should be capitalized because they are proper nouns in your world even if they’re common nouns in our world. Your editor will probably add to this document or create one if you don’t supply one. Consistency is one of the things the editor will be looking to make happen in your manuscript.
Questions?
Anything I didn’t cover here that you’d like to know?
~ Lara
PS – Information about my editing services can be found here.
Discover more from LZ Edits | Editing Services
Subscribe to get the latest posts sent to your email.
